The fastest way to add 'Build a Website in a Day' to your services
Set up payments for your services using Stripe integration.
Yes! But before you can get paid, you'll need to connect Stripe to Julip.
Be sure to connect your Stripe to get paid for your services (and the best part, once you do that you're automatically enrolled in our affiliate program)
Julip does not take a cut of your services, but Stripe does. If you'd prefer to use a different tool (i.e. PayPal or something else) you can link to that platform. But all of them take a fee sadly.
When creating your service, you'll want the URL you send people to go to that link.
Here's how you can get paid for your services and embed a stripe checkout form.
Create a 'Category'.
This is how you organize your different services
Then you'll add the following details:
- Service Title
- Description. This description is up to 130 characters long. If you want to add more details. You'll want to read option 2 and 3 below.
Optional fields:
- Cover photo
- Time (this is a great one for example if you want to do 1:1 coaching call or it could be you're a dog walker and want to share your different pricing for different length walks)
- Price
- If you don't want to list pricing, skip this and keep it turned off.
- If you want to list your pricing, add your price and ensure it has the right currency for where you're based.
This next part is REALLY key if you want to get paid.
As you can see there is an OR option here of where you want people to go.
There are 3 options of how you can format this part.
Option 1: A short descriptor
If you just want a quick thumbnail describing your service. Like this ⤵️
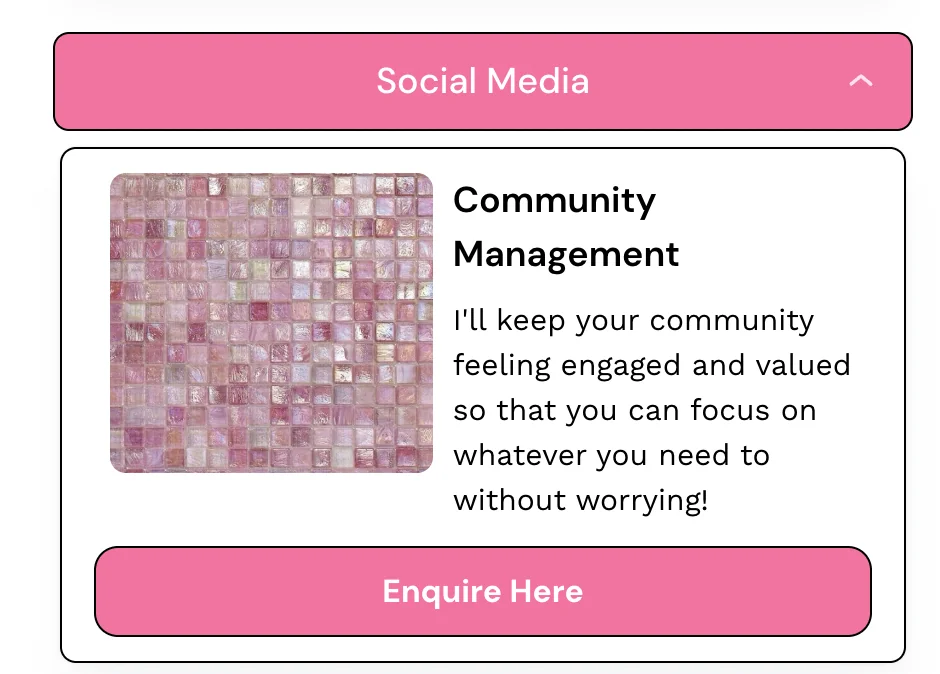
You'll want to include a button title (i.e Let's Chat, Email Me, etc) and then add the email or link you'd like people to use for the next steps.
Option 2: Long Description without embedding payment
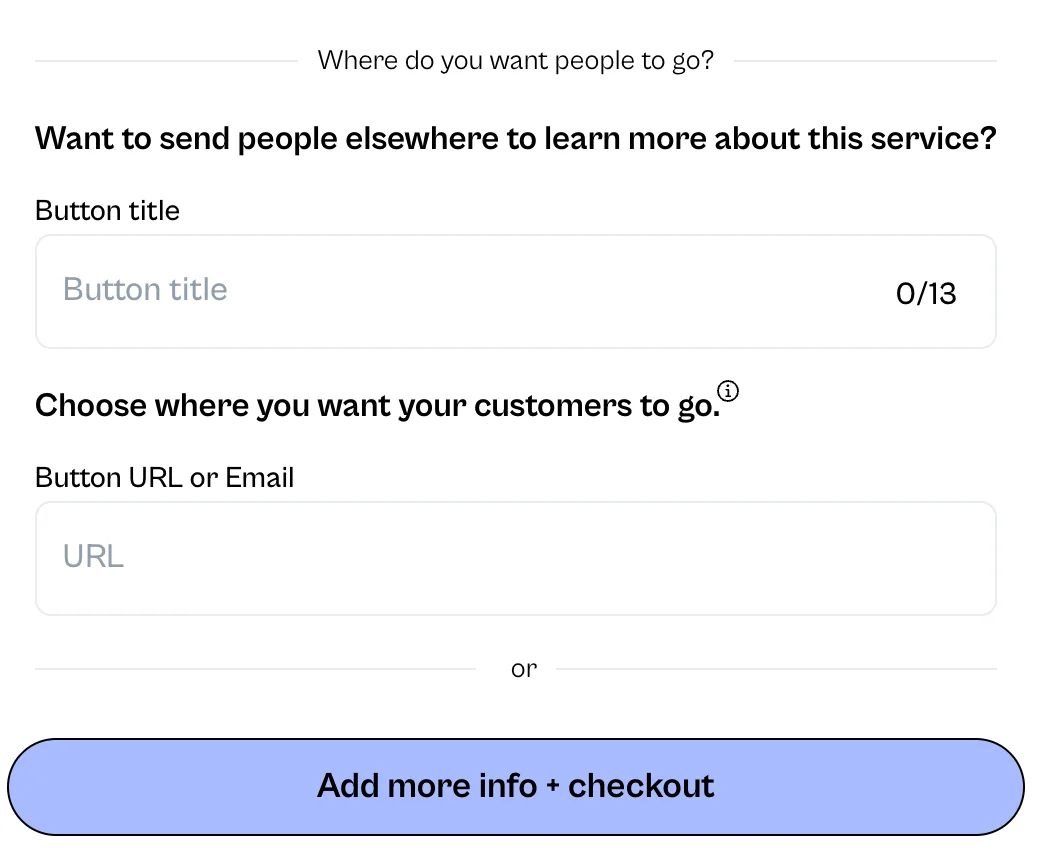
You'll add copy where it says Button Title. We recommend 'Learn More' since you're taking them to another page inside your Julip. LEAVE Button URL or Email BLANK!
Next you'll be directed to a new page where it will ask you to enter the following details:
- Service Title - You can put the name of your service or even something like 'What's Included'?
- Body Copy - This is where you can add as much information as you'd like. There is no limit. You can also: bold, italize, underline, hyperlink, bullet list and add images!
- Cover photo (optional) - I do think it looks a lot better when you add a photo here and we recommend the image be horizontal.
- Testimonials - You'll need to add testimonials ON the main service page to automatically add them here. If you haven't added your testimonials yet, complete this page and then you can always add more testimonials here later.
Again you have the option of where to send people. If you do NOT want to charge your customers here via Stripe or our embedded feature follow these next steps.
As you can see you have 2 options. To link people to a different place and NOT embed a stripe checkout form. Here's what you want to do:
- Button URL or Email - Add the link or email you want to send people to.
- Button Title - It will say the same thing as you entered in the previous screen. For example, if you initially wrote Learn more it will say 'Learn more'. We recommend changing this to an action. As you can see here, the copy has been updated to 'Let's Chat'
- Click Create to save
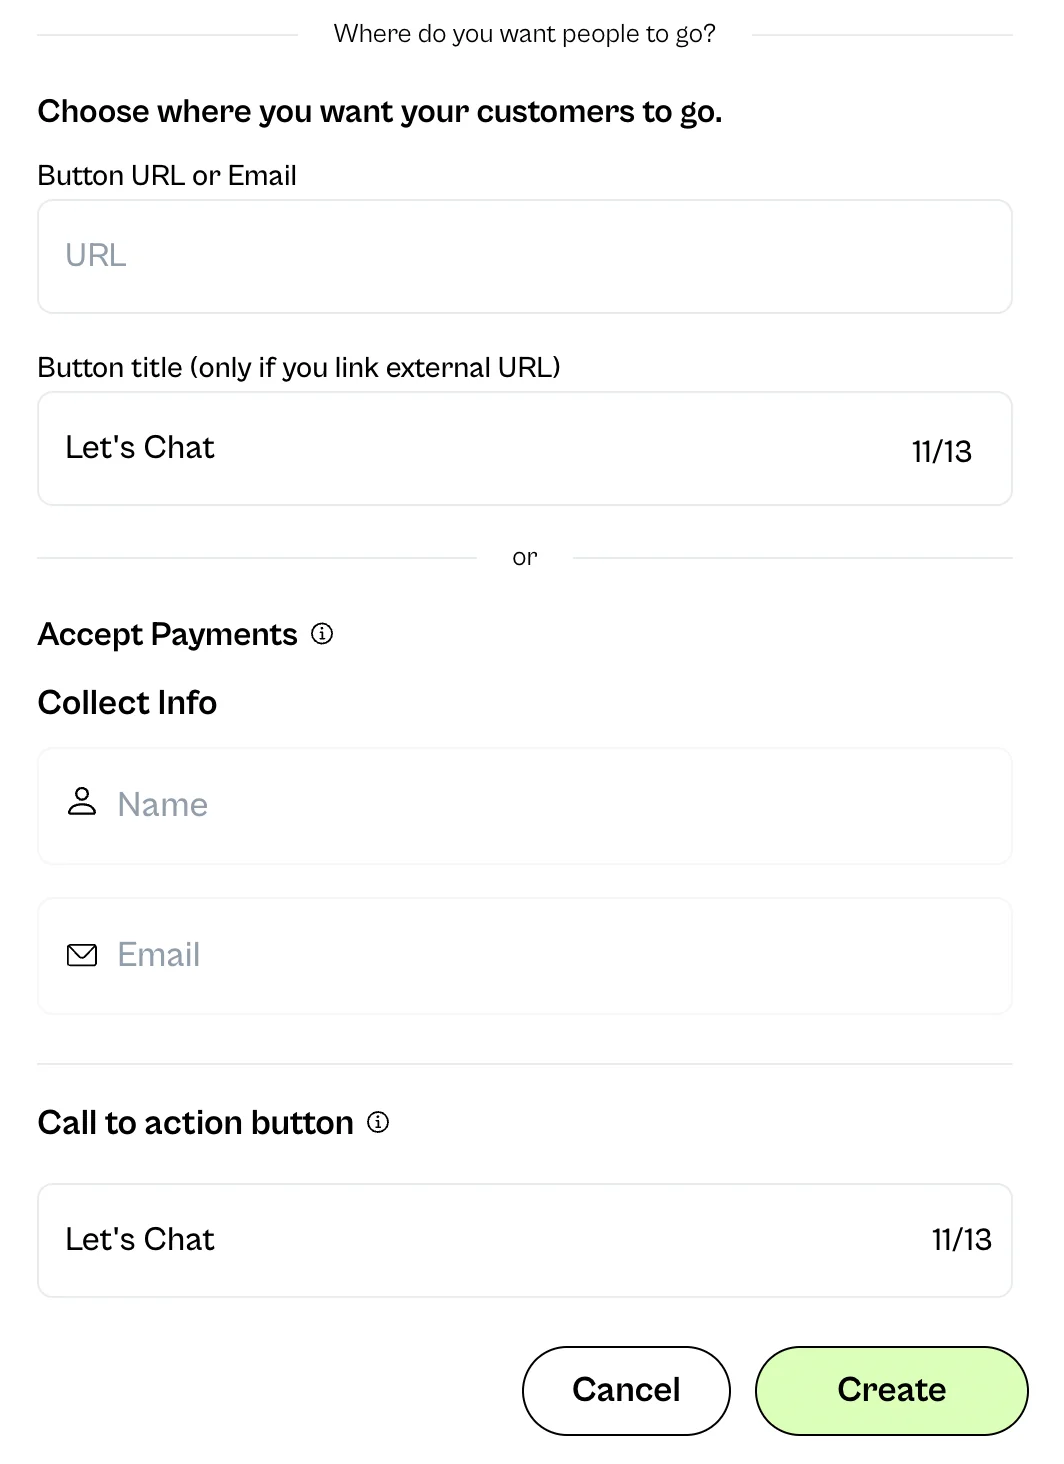
Option 3: Long Description and EMBED payment via Stripe
You'll do EVERYTHING the same as Option 2 except the last part.
- Button URL or Email - LEAVE THIS BLANK
- Button Title - Whatever copy you put here will be the button at the end of the checkout form (i.e. Buy now, Book today, etc)
- Accept Payments - You don't have to do anything here, we've already synced everything up.
- Write confirmation email - You'll see a button because you're offering a paid service that reads 'Edit confirmation email'. We did the heavy lifting and added all the critical information. You don't have to edit or write anything but if you want to share some details, this is the spot to do so.
- Click Create to save and then save 1 more time